How to clean fiberglass?

How to clean fiberglass

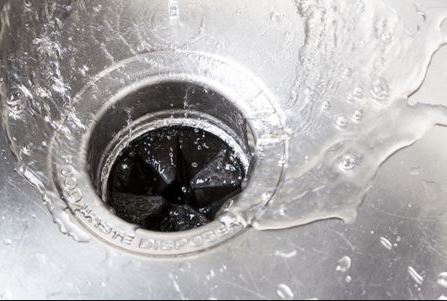
People have to clean fiberglass on a daily basis since it is commonly used in the manufacturing of a number of different items at home such as sinks, bathtubs, showers, etc. Fiberglass is a durable material; however, it is also susceptible to get dirty due to regular use at homes. In this article, we will explain a standard process with the help of which the readers can clean fiberglass at home without requiring any professional help.

Supplies required to perform the fiberglass cleaning process

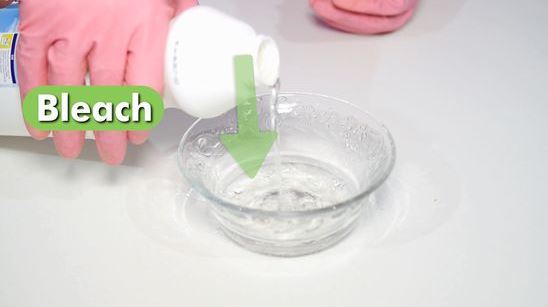
Few supplies will be required in order to perform the process to clean fiberglass. It is important for users to first analyze the cleaning requirements of the fiberglass item so that appropriate supplies can be selected. In case, there are different kinds of spillages such as paint or stains present on the items then different supplies may be required. Supplies required to perform a basic learning process are as follows:

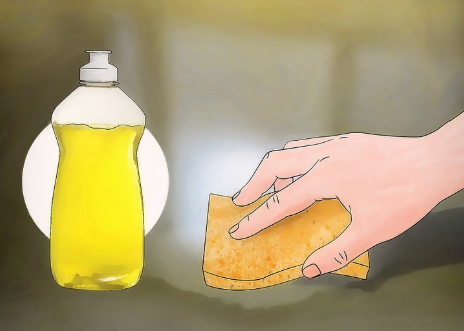
  1. Cleaning agent: A common cleaning agent such as dishwasher cleaner will help in effectively removing stains and dirt from the fiberglass item.
  2. Paint remover: In case there are paint spillages present on the fiberglass items, then an appropriate paint remover will help in the process to remove them.
  3. Hard stain remover: In case there are hard stains present on the item then phosphoric acid can help in removing them since in such cases dishwasher or other cleaning agents may not perform appropriately.
  4. Brush: It will help in removing stains and spillages from the fiberglass items.
  1. These tips and techniques are provided by Always Preferred Restoration, a carpet cleaning and restoration company in Missoula MT: https://www.wedefineclean.net
Continue reading “How to clean fiberglass?”

How to Clean Garbage Disposal?

We recommend our readers to clean garbage disposal of their kitchen sink on a regular basis since it can drastically affect the environment of their kitchens. Garbage disposals of the kitchen sinks perform an excellent function of removing food and other unwanted materials, however, over the course of time all these unwanted particles may start to accumulate in them and result in an odor in the kitchen. Even though the garbage disposals are mostly self-cleaning, they may accumulate food items, which start to decay after a short period resulting in unwanted odor in the kitchen. Therefore, special attention should be given in order to clean garbage disposal on a regular basis. In this article, we will explain a standard process with the help of which the readers can clean garbage disposal in an effective manner on their own.

Steps involved in the process to clean garbage disposal

There are some easy and convenient methods, which can help in cleaning the garbage disposal. Readers can follow the steps below in order to carry out general cleaning of the garbage disposal:

  1. In the first step to clean garbage disposal, check the garbage disposal physically to see if food and other particles have accumulated inside. In case there are trapped materials or objects, make sure to remove them.
  2. Flush the garbage disposal with the help of water so that dirt or loosely trapped items get removed.
  3. The use of ice cubes and salt is popular in order to clean the garbage disposal. When the ice cubes are crushed with the help of the blades of garbage disposal, it helps to remove the trapped items and clean the inside of the garbage disposal.
  4. An iced solution of vinegar can also be used in order to carry out a more effective cleaning of the garbage disposal.
  5. In the end, use a brush to scrub the inside of the garbage disposal so that struck object gets dislodged.

Steps involved in the process to eliminate odors

When the trapped food items in the garbage disposal start to decay, they give an unbearable odor. Following steps can help in order to eliminate odor in the kitchen:

  1. Make a solution of vinegar by mixing it in water. Add a small percentage of bleach and borax so that it can give effective results.
  2. Now pour the cleaning mixture in the sink so that it will clean the inside of the garbage disposal and remove those germs, which are resulting in the spread of odor in the kitchen.

For more cleaning tips Clean VacuumClean FiberglassClean ShoesHomemade CleaningClean Earrings.

How to Effectively Clean Vacuum Cleaner parts?

It may sound arduous to comprehensive clean vacuum cleaner parts and exterior but it is also one of the most important jobs that should be regularly performed. The equipment that we use for cleaning purposes is also among the dirtiest items in our homes since they are regularly exposed to all sorts of dirt, germs, and garbage. All the dirt that they remove from other items in the building may stick to them causing inefficiency in operation and spread of germs in the building. The vacuum cleaner is a commonly used cleaning equipment at homes since it can quickly remove dirt from carpet and floor. However, over the course of time, the vacuum cleaner parts may start to get soiled resulting in loss of efficiency in performance. Therefore, it is recommended to clean vacuum cleaner parts regularly as per the procedure explained below:

Performing Basic Cleaning of a Vacuum Cleaner

The basic cleaning of the vacuum cleaner involves cleaning different parts and removing the clogged garbage items. Below are some of the steps that should be carried out to clean vacuum cleaner parts regularly:

  1. In the first step, unplug the vacuum cleaner and separate different parts as per the instructions in the user manual. The two important parts that should be removed are canister and filter.
  2. Now empty the canister and remove all the garbage inside it. Thoroughly clean the canister somewhere outside so that the dust doesn’t spread in the building.
  3. Now take a cloth and wet it in a solution of water and a cleaning agent. This will help clean dirt and germs from different parts of the vacuum cleaner.
  4. Start wiping to clean vacuum cleaner parts such as its exterior body, lid, outside of hose, cord, etc.
  5. Take out the filter from the vacuum cleaner and rinse it with the help of cold water. The filter is one of the most significant parts whose performance affects the performance of the vacuum cleaner as well.
  6. Let the vacuum cleaner dry for a few hours. It is recommended to let it dry under the sun.

Performing Deep Cleaning of a Vacuum Cleaner

In deep cleaning, all the significant parts of the vacuum cleaner are thoroughly cleaned i.e. the clogged garbage and germs are removed. Some of the steps involved in deep cleaning are as follows:

  1. Hair can get clogged in the beater bar over the course of time. They can affect the operation of the vacuum cleaner. These hairs should be removed with the help of scissors or other suitable tools.
  2. Germs can also accumulate in the beater bar requiring the disinfecting process to be carried out. Apply alcohol to a cotton swab and rub it along the beater bar so that the germs can be killed off. Spin the beater bar clockwise in order to clean all areas.
  3. Hose in another part of the vacuum cleaner that can be affected by clogs. Remove the garbage and clogs in the hose with the help of a wire. Remove dust from the inside of the hose as well.
  4. Disinfect the hose with the help of a cleaning agent. Let it dry for a few hours after rinsing with water.

For more cleaning tips Clean Garbage , Clean FiberglassClean ShoesHomemade CleaningClean Earrings.

How to Clean Shoes Using Rubbing Alcohol and Bleach?

One of the essential tasks that should be performed in order to stay healthy is to clean shoes and other items that we wear on a daily basis. Inside area of Shoes is among those places that provide a suitable environment for the germs and microbial to grow and multiply. The damp conditions and perfect temperature range results in the growth of harmful microbial, which can be a source of various foot diseases. Similarly, over the course of time, the shoes accumulate dirt, and their original look starts to fade. Therefore, we recommend that everyone should clean shoes at least once a week using a basic cleaning method that they can perform at home. This will not only ensure the protection of their feet but also ensure the longevity of shoes. The shoe cleaning method is given below:

Supplies Required to Perform the Shoes Cleaning Method

There are a number of household items that can be useful in cleaning the shoes. Some of the items are given below:

  1. Bleach: A useful ingredient to clean shoes as it helps in removing dirt and other stains from the sole of the shoes. Mostly white colored soles get dirty quickly. A solution of bleach can help restore the original look.
  2. Rubbing Alcohol: It is another cleaning solution that is useful in removing dirt and stains from the shoes. It can also kill off germs and fungus that is present inside the shoes.
  3. Soft Cloth: In order to remove dirt and stains, a soft cloth will be required. We
    recommend applying the cleaning solution with the help of a soft cloth for better results and protection of the shoes.
  4. Gloves: We recommend wearing gloves while performing the cleaning process.
    Contact with chemicals can produce a bad reaction.

Steps involved in Shoe Cleaning Procedure

The steps involved in the process to clean shoes using bleach and rubbing alcohol are as following:

  1. Get the supplies ready and place the shoes in an open setting.
  2. We recommend covering the canvas of the shoes in the area where it meets the sole. It will help in protecting the bond between the canvas and the sole while we perform the process to clean shoes. Masking tape or any other item is suitable for the purpose.
  3. Now, take the cleaning solution in a bowl and soak the cloth in the solution. Make sure that an appropriate concentration of the solution is available. We also recommend using a brush in case the stains on the sole are hard to remove.
  4. Now, start rubbing the dirty areas of the shoes with the help of the cloth or the brush. The dirt will start to come off on persistent rubbing. Continue rubbing the sole until the dirt comes off completely.
  5. Take a fresh cloth and mildly dip it in the cleaning solution. Rub it in the inner portion of the shoes.
  6. Now, soak a fresh piece of cloth in water and wipe down the shoes using it.
  7. Let the shoes dry for some time in the open air.

For more cleaning tips Clean VacuumClean FiberglassHomemade CleaningClean Earrings.

How to Clean Earrings?

There are different methods that can be used in order to clean earrings at home on a regular basis without seeking the help of professionals. It is important to clean earrings regularly since dirty jewelry will be counterproductive and affect the overall look. Similarly, earrings may gather dirt and germs over the course of time, which on coming in contact with the ears can cause health issues. The ear holes are sensitive and accumulation of germs can lead to serious issues as well. Therefore, it is advisable to regularly clean earrings following one of the methods described below:

Hydrogen Peroxide Cleaning of Earrings

Hydrogen Peroxide is a useful cleaning agent, which can remove dirt and germs from the earrings. The steps involved to clean earrings using hydrogen peroxide are as follows:

  1. In the first step, was your hands with the help of a cleaning agent.
  2. Now, take a cotton ball and soak it with the help of hydrogen peroxide. Make sure to appropriately saturate the cotton so that the cleaning process can be smooth.
  3. Now start dabbing the cotton ball over the earrings until the dirt and germs have been removed. This should take a couple of minutes with each earring.
  4. Another way of cleaning the earrings with the help of hydrogen peroxide is dipping them in the solution for a few minutes. Let them dry completely afterward.

Hot Water Cleaning of Earrings

A more cost-effective way to clean earrings is with the help of hot water and a soft brush. The steps involved in the process are as follows:

  1. In the first step, take an appropriate quality of water and heat it in an oven for a few minutes.
  2. Once the water is mildly hot, place the earrings in it for a few minutes. This will
    weaken the bond between the dirt and the material.
  3. Now, take the earrings out of the water and scrub it with the help of a brush.
  4. Continue gentle brushing until the dirt and other residue has been removed from the earrings. Deep Cleaning of Precious Metal Earrings
    In order to clean precious metal earrings, more careful and sophisticated techniques are advisable to use since chemicals can affect their shine and color. Professional help is also useful in order to clean earrings made of precious metals. However, to clean precious metal earrings at home, followings steps can be followed:
  5. Diamond earrings can be cleaned with the help of hot water and soap since this will not affect their color and effectively remove dirt and germs.
  6. Water and baking soda are highly effective in cleaning silver earrings since baking soda is an effective natural cleaning agent. It can remove dirt and germs from the surface of the metal.
  7. Lukewarm water and an appropriate cleaning agent such as soap are useful to clean pearl earrings. Harsh chemicals can damage the shine and outlook of these earrings. Therefore, natural cleaning agents are more useful and effective.
  8. The dirt from precious metal earrings should be removed with the help of a soft cloth of a toothpick. The process should be smooth and careful.

For more cleaning tips Clean VacuumClean FiberglassClean ShoesHomemade Cleaning.